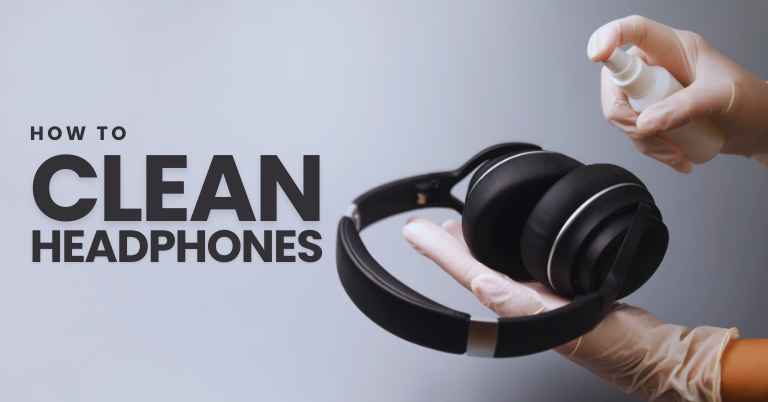
To clean headphones, use a soft cloth dampened with warm water and mild soap to wipe the exterior. Remove ear pads or tips and clean them separately with soap and water, if applicable.
Gently brush any debris from the headphone grille and wipe it off with a cloth. Let the headphones dry completely before use. Introducing a regular cleaning routine for your headphones not only maintains their appearance but also ensures optimal sound quality.
Over time, sweat, dirt, and oils from the skin can accumulate on the headphones, affecting their performance. We will discuss some simple yet effective techniques to keep your headphones clean and in good condition. By following these steps, you can prolong the lifespan of your headphones and enjoy a superior listening experience.
Preparation And Tools
To effectively clean your headphones, you will need a few tools and preparation. Start by gathering a soft cloth, cotton swabs, and a gentle cleaning solution. Avoid using water directly on the headphones and carefully wipe down the surfaces to remove dirt and grime.
Gather Necessary Supplies
To clean your headphones effectively, you will need a few essential supplies. These tools will ensure that your headphones are thoroughly cleaned without causing any damage. Here are the supplies you will need:
- A soft cloth or microfiber cloth
- Dish soap or cleaning solution specially designed for electronics
- A small brush with soft bristles or a toothbrush
- Cotton swabs or Q-tips
- Isopropyl alcohol (if recommended by the manufacturer)
Preparing The Workspace
Before you begin cleaning your headphones, it is important to prepare your workspace properly. Taking this step will help you avoid any accidents or loss of small parts during the cleaning process. Follow these steps to prepare your workspace:
- Choose a clean and well-lit area to work in.
- Cover your workspace with a soft cloth or towel to protect your headphones from any scratches.
- Ensure that you have all the necessary supplies within reach.
- If your headphones come with detachable parts such as ear cushions or cables, remove them carefully and place them in a safe location.
By gathering the necessary supplies and preparing your workspace, you will be ready to clean your headphones effectively and efficiently. Following these steps will help you maintain the quality and longevity of your headphones, ensuring that you can enjoy your music with crystal-clear sound for years to come.
Cleaning The Earpads
To keep your headphones clean, don’t forget to clean the earpads regularly. Use a gentle cleaning solution and a soft cloth to wipe away dirt and grime, ensuring optimal sound quality and comfort.
Removing Earpads
To properly clean and maintain your headphones, it’s important to start by removing the earpads. This allows you to access the surface and crevices where dust, dirt, and bacteria can accumulate over time. The following steps will guide you in safely removing the earpads:
- Carefully examine the earpads for any clips, snaps, or detachable parts that hold them in place.
- If there are visible attachment points, gently unhook or unsnap the earpads from the headphones. Be cautious not to force or tug excessively, as this may damage the earpads or the headphone itself.
- If the earpads are not removable, they may be attached using adhesive. In such cases, avoid using excessive force to prevent any damage. Take a closer look at the earpad perimeter, gently lift one edge, and carefully peel it away from the headphone. Repeat this process for the remaining edges until the earpads are completely detached.
Cleaning With Gentle Solutions
Once the earpads have been successfully removed, you can proceed with cleaning them using gentle solutions. The following steps will help you clean your earpads effectively:
- Prepare a mild cleaning solution by mixing a few drops of liquid soap or mild detergent with warm water. Ensure that the solution is not too concentrated, as this might cause damage to the earpads.
- Dampen a soft cloth or sponge in the cleaning solution. Make sure that it is not soaking wet to avoid water damage. Alternatively, you can use a cotton ball or swab for more precise cleaning.
- Gently wipe the surface of the earpads using the damp cloth or sponge. Pay special attention to any accumulated dirt or residue, ensuring that you cover the entire surface of the earpads.
- If there are stubborn stains or grime on the earpads, you can apply a small amount of the cleaning solution directly to the affected area. Use gentle circular motions with the cloth or sponge to lift and remove the stain.
- Once you are satisfied with the cleaning results, rinse the cloth or sponge with clean water and remove any soap residue from the earpads by wiping them again.
- To dry the earpads, gently pat them with a clean, dry cloth. Avoid using a hairdryer or any direct heat source, as this can cause deformation or damage to the earpads.
Caring For The Headband
When it comes to caring for your headphones, the headband is an essential component that requires regular cleaning to maintain its durability and comfort. Whether your headband is made of leather, fabric, or plastic, proper cleaning methods are crucial to prevent damage and maintain hygiene. In this section, we will explore the best practices for cleaning and caring for the headband of your headphones.
Identifying Headband Materials
Before cleaning your headband, it’s important to identify the material it’s made of. Different materials require specific cleaning methods to ensure they remain in optimal condition. Here are the common headband materials and how to identify them:
| Material | How to Identify |
|---|---|
| Leather | The surface will have a smooth, natural texture and may feature visible pores. |
| Fabric | Inspect for visible woven or knit patterns, indicating fabric material. |
| Plastic | Smooth, glossy texture often characterizes plastic headbands. |
Using Safe Cleaning Methods
Once you have identified the material, employ safe cleaning methods to preserve the quality of your headband. Here are the steps to clean headbands made of different materials:
- Leather Headbands: Use a soft, slightly damp cloth to gently wipe away dirt and oil. Condition the leather with a suitable leather conditioner to maintain its luster and prevent cracking.
- Fabric Headbands: For fabric headbands, spot clean with a mild detergent and water. Avoid soaking the fabric to prevent damage.
- Plastic Headbands: Wipe the plastic headband with a non-abrasive, damp cloth. Use a mild soap solution for tougher stains and dry thoroughly with a clean cloth.
Cleaning The Cables
When it comes to cleaning headphones, it’s essential not to overlook the cables. Over time, cables can accumulate dirt, dust, and even get tangled up, affecting the sound quality and overall performance of your headphones. In this section, we’ll discuss two crucial steps to effectively clean and maintain your headphone cables: Detangling and Inspecting, and Wiping Down the Cables.
Detangling And Inspecting
Tangled cables are a common occurrence that can cause frustration. To safely detangle your headphone cables, start by gently holding one end of the cable and using your other hand to locate the tangled area. Slowly and patiently work your way through the tangles, alternating between gently pulling the cable and using your fingers to loosen any knots. Remember, avoiding excessive force is essential to prevent damage.
While detangling, it’s also a good idea to inspect the cables for any signs of wear and tear, such as frayed or exposed wires. If you spot any damage, it’s crucial to address it promptly to prevent further issues. You can use small adhesive tape or heat shrink tubing to repair minor cable damage. However, if the damage is extensive or affects the functionality of the headphones, it’s best to consult a professional or consider replacing the cables altogether.
Wiping Down The Cables
After detangling and inspecting, it’s time to give your headphone cables a thorough wipe down. Start by preparing a cleaning solution using a mild detergent or rubbing alcohol and warm water. Dip a clean, lint-free cloth or cotton swab into the solution, ensuring it is not soaked but slightly dampened. Gently wipe down the entire length of the cable, removing any dirt and grime. Be cautious not to wet the connectors or audio jacks as this can damage the electrical components.
Once you’ve wiped down the cables, use a separate dry cloth or paper towel to remove any excess moisture and ensure the cables are completely dry before using or storing them. Additionally, it’s advisable to clean the cables regularly, depending on your usage, to maintain their cleanliness and prolong their lifespan.
Drying And Reassembling
After thoroughly cleaning the different parts of your headphones, the next step is to allow sufficient drying time and reassemble them. This ensures that your headphones are completely dry and ready to be used again.
Allowing Sufficient Drying Time
- Air Drying: The simplest and most effective way to dry your headphones is by air drying them. Remove the ear cushions, detachable cables, and any other removable parts from the headphones. Place them on a clean, dry surface and let them air dry naturally. Avoid using heat sources like hairdryers or placing them in direct sunlight, as this can cause damage to the headphones.
- Using Silica Gel Packets: To speed up the drying process, you can place your headphones and their components in a container along with silica gel packets. Silica gel has exceptional moisture-absorbing properties and can help dry out your headphones more quickly. Make sure to seal the container tightly to prevent any moisture from entering.
Tip: Always check the manufacturer’s instructions before using silica gel packets to ensure they are safe for use with your headphones.
- Patience is Key: Depending on the level of moisture present, drying time can vary. It is essential to be patient and allow sufficient time for your headphones to dry completely. Rushing the drying process may lead to moisture remaining inside, potentially causing damage to the internal components.
Putting Everything Back Together
- Checking for Damage: Before reassembling your headphones, inspect all the components for any signs of damage. Check for loose wires, broken connectors, or any other issues that may have occurred during the cleaning process. If you notice any damage, it is advisable to seek professional repair services.
- Reattaching Ear Cushions: Place the cleaned ear cushions back onto the headphones. Make sure they are aligned correctly and securely fastened. This not only enhances comfort but also helps to maintain sound quality.
- Attaching Cables: If your headphones have detachable cables, carefully reattach them, ensuring they are securely plugged in. Double-check the connections to guarantee proper audio transmission and prevent any potential audio issues.
- Testing: Once you have reassembled your headphones, it’s time to test them. Connect your headphones to a music player or any audio device and play a test track. Check if the sound is clear and that all the components are functioning correctly. If everything is working as expected, congratulations! Your headphones are now clean, dry, and ready to provide you with an excellent audio experience again.
Frequently Asked Questions On How To Clean Headphones
1. How Often Should I Clean My Headphones?
It is recommended to clean your headphones once a month to prevent the buildup of dirt, sweat, and bacteria. Regular cleaning not only improves sound quality but also prolongs the lifespan of your headphones.
2. What Is The Best Way To Clean Headphones?
To clean headphones, gently wipe down the earpads and headband with a damp cloth, using mild soap if necessary. Be careful not to get moisture into the drivers. Use a soft brush or cotton swabs to remove dirt from crevices.
Avoid using harsh chemicals or soaking the headphones.
3. Can I Clean My Headphones With Water?
Yes, you can clean your headphones with water. However, it is important to use a damp cloth and avoid excessive moisture. Do not submerge the headphones or expose them to running water, as this can damage the electronics. Always ensure the headphones are completely dry before using them again.
Conclusion
In order to keep your headphones in top condition, regular cleaning is essential. By following the simple steps outlined in this guide, you can ensure that your headphones remain hygienic, maintain their performance, and have a longer lifespan. With just a few minutes of care, you can enjoy crystal-clear sound quality for a long time.