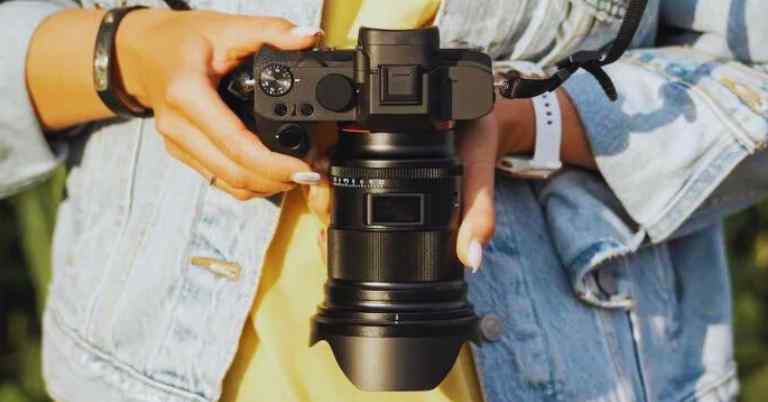
Mirrorless cameras have revolutionized the world of photography. They offer high-quality images, compact designs, and advanced features. But like any piece of technology, they require proper care and maintenance.
One crucial aspect of this maintenance is sensor cleaning. The sensor is the heart of your camera. It captures light and transforms it into the stunning images you see.
However, over time, dust and debris can accumulate on the sensor. This can lead to spots, blurs, or blemishes in your photos. It can also damage the sensor if left unchecked.
RELATED TOPIC:
Cleaning your camera sensor might seem daunting. It’s a delicate component, and mishandling it can cause serious damage. But with the right knowledge and tools, you can do it safely and effectively.
This guide will walk you through the process of cleaning a mirrorless camera sensor. It will cover everything from recognizing when your sensor needs cleaning to the actual cleaning process. It will also discuss the tools you need and the best practices to follow.
We’ll also delve into the differences between cleaning mirrorless and DSLR camera sensors. While they share similarities, there are key differences to be aware of. Understanding these differences can help you clean your sensor more effectively.
Additionally, we’ll explore the debate between wet and dry cleaning methods. Each has its pros and cons, and knowing which to use can make a big difference. We’ll also discuss the frequency of sensor cleaning and how to maintain a clean sensor.
Whether you’re a professional photographer or a hobbyist, this guide is for you. It’s designed to help you keep your camera in top shape. Because a clean sensor is key to capturing the best possible images.
So, are you ready to learn how to clean your mirrorless camera sensor? Let’s get started.
Understanding the Importance of Sensor Cleaning
A clean camera sensor is vital for image quality. The sensor is exposed when you change lenses, which can lead to dust accumulation. Dust particles can mar your photos and become noticeable, especially in areas with uniform color or texture, like skies.
Tiny specks on the sensor are enough to affect the clarity of your shots. These imperfections may appear as spots or smudges. Regular cleaning ensures your images remain sharp and blemish-free.
A well-maintained sensor can also extend the life of your camera. Dust and debris can cause long-term damage if not addressed timely. Cleaning your sensor at regular intervals helps prevent potential repair costs in the future.
Consider the following benefits of a clean sensor:
- Improved Image Quality: A clean sensor results in sharp and clear pictures.
- Enhanced Camera Longevity: Keeps your equipment in optimal condition.
- Reduced Post-Processing: Less time spent editing out spots or blemishes.
- Increased Resale Value: A well-maintained camera is more valuable on the second-hand market.
- Professional Results: Ensures your work maintains a professional standard.
Cleaning your sensor is a preventive measure. It stops small problems from becoming significant issues. Regular checks are necessary for the upkeep of your gear, even if you don’t notice immediate effects.
Camera sensors in mirrorless models might need more frequent cleaning. This is due to their design, which lacks a mirror to protect the sensor. Understanding this distinction is crucial when planning your maintenance routine.
Neglecting sensor cleanliness can have aesthetic and financial repercussions. Blemishes in photos detract from their appeal. Over time, dust build-up could necessitate costly repairs or replacements.
In summary, prioritizing sensor cleanliness ensures your camera delivers its best performance. It supports your creative expression by providing crisp, clear images. This small effort in maintenance pays off in both the short and long term.
Recognizing When Your Sensor Needs Cleaning
Understanding the signs of a dirty sensor can save you time and frustration. It’s essential to recognize these signals early. This proactive approach prevents compromised image quality.
A common indicator is spots or dots in your photos. These appear often against bright backgrounds. They look like gray or black spots and seem to persist in the same location across images.
Another sign is the presence of smudges or smears. These might appear if particles smear when you change lenses. Such marks can mar otherwise perfect shots, especially in high-light situations.
If your images lack clarity, a dirty sensor may be the culprit. Such issues could be confused with lens problems. However, consistent spots across multiple lenses usually indicate a sensor issue.
Check your sensor using this simple process:
- Take a photo of a plain, light-colored surface like a wall or sky.
- Set your aperture to a high f-stop number (e.g., f/16 or higher).
- Review the image on a large screen to identify any visible spots or blemishes.
Sensor cleaning becomes necessary when these signs persist. Ignoring them can lead to more severe issues. Taking early action helps maintain your sensor’s performance and longevity.
Conduct these checks routinely, especially before important shoots. Regular monitoring ensures that any dust or particles are addressed quickly. A clean sensor boosts your confidence and guarantees photo excellence.
Preparing for Sensor Cleaning: Tools and Environment
Proper preparation is crucial before cleaning your camera sensor. It ensures efficiency and prevents potential damage. Start by gathering the right tools for the job.
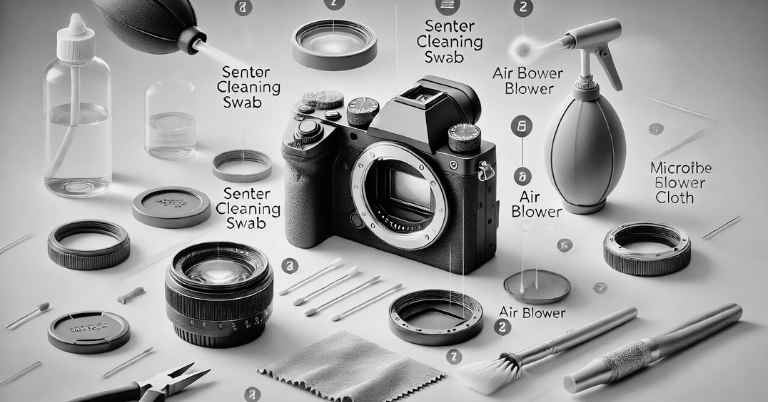
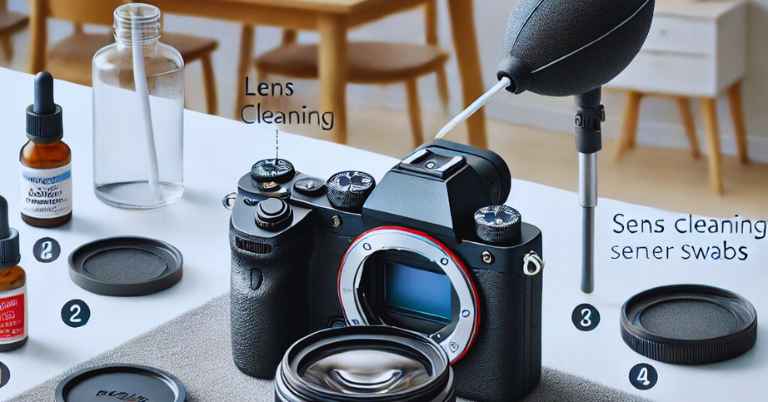
Essential tools for sensor cleaning include:
- Sensor swabs: Select the correct size for your sensor.
- Cleaning solutions: Use only products designed specifically for camera sensors.
- Air blower: An essential tool to remove loose dust without contact.
- Lens cleaning cloths: For cleaning camera body surfaces and lenses.
- Sensor loupe: Assists in spotting particles on your sensor.
- Sensor brush: For removing non-sticky dust and particles.
- Tripod or stable surface: Keeps your camera secure during cleaning.
Choose an appropriate environment to reduce the risk of contamination. A well-lit, clean, dust-free room is ideal. Avoid areas with high humidity or airborne particles.
Ensure your camera battery is fully charged before cleaning. A low battery could cause the sensor-shutter mechanism to close unexpectedly. This would pose a risk of damage.
Follow these environmental preparation steps:
- Work surface: Use a clean table or desk free from clutter.
- Lighting: Utilize a lamp or natural light to see clearly.
- Air quality: Turn off fans or air conditioners to minimize dust movement.
- Temperature: Maintain a comfortable room temperature, not too humid.
Familiarize yourself with your camera’s specific requirements. Consult the user manual for guidance on sensor access and cleaning modes. Each brand may have particular instructions or warnings.
When ready, activate the sensor cleaning mode, if available. This mode locks up the shutter to provide sensor access. Follow instructions to prevent accidental damage during the process.
Wash your hands thoroughly before beginning. Clean hands reduce the chance of transferring oils or dirt onto the sensor. Avoid using hand lotions or creams before handling the camera.
Finally, plan each step of the cleaning process. Having a clear outline prevents unnecessary mistakes. A methodical approach leads to effective and safe sensor cleaning.
Preparation is key to a successful sensor cleaning experience. Gathering the right tools and setting a proper environment prevent mishaps. These steps ensure your sensor remains pristine and ready for capturing stunning photos.
Step-by-Step Guide to Cleaning Your Mirrorless Camera Sensor
Step 1: Safety Precautions and Initial Preparations
Before you start, ensure you have a fully charged battery in your camera. This is crucial to prevent it from shutting off unexpectedly during the process.
Begin by choosing a clean, dust-free workspace. A clutter-free environment minimizes the risk of particles landing on your sensor during cleaning.
Next, carefully remove the lens from your camera. Keep the camera body facing downward to avoid any dust settling on the sensor.
Consult your camera’s manual for specific instructions on accessing the sensor. Each model might have unique steps or precautions.
It’s essential to activate any available sensor cleaning modes on your camera. This often involves locking up the shutter to expose the sensor safely.
Lastly, wash and dry your hands thoroughly to prevent transferring oils or grime to your camera or sensor. Clean hands are a must for this delicate task.
Step 2: Using a Blower for Loose Dust
With your camera sensor exposed, your first tool is the air blower. It’s a simple but effective device for removing loose dust particles without contact.
Hold your camera facing downwards to let gravity help in dust removal. Use gentle squeezes of the blower to eject air across the sensor.
Avoid using canned air as it may release propellants or moisture. Always opt for a manual, hand-squeezed blower.
It’s important to maintain a safe distance from the sensor with the blower’s nozzle. Direct contact might cause damage.
Repeat the blowing process a few times, ensuring consistent coverage across the sensor’s surface. This helps clear as much debris as possible.
Check the sensor condition with a sensor loupe or magnifier. These tools help spot any remaining dust that needs further attention.
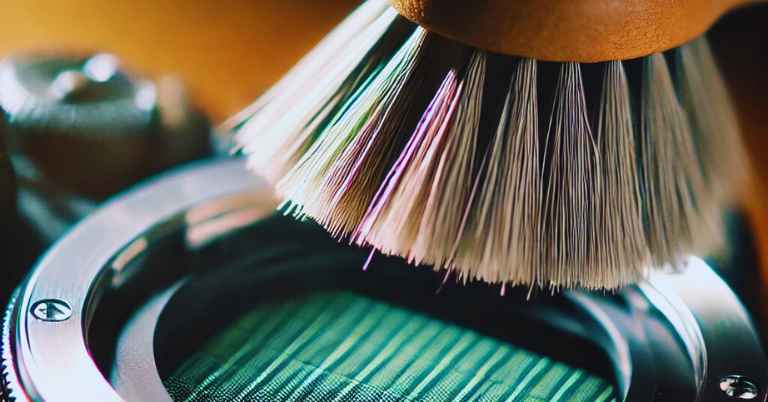
Step 3: Brushing Away Non-Sticky Particles
If the blower leaves some dust behind, it’s time for the sensor brush. This brush is designed to gently sweep away stubborn, non-sticky particles.
Hold the brush at an angle and gently stroke across the sensor surface. Always use even pressure to avoid causing any damage.
Ensure the brush is clean and free from any dirt before use. You may clean it by blowing compressed air through the bristles.
Start from one edge of the sensor and work towards the other. This technique covers the entire sensor systematically.
If dust remains, consider whether the particles are beyond the brush’s capability. Some may require wet cleaning methods.
As always, perform this step with patience and care. Rushing could lead to accidental sensor damage, which is best avoided.
Step 4: Wet Cleaning with Sensor Swabs and Solutions
If dry methods aren’t enough, proceed with wet cleaning. This is essential for removing sticky or oil-based residues.
Select the correct size sensor swab for your camera model. Size matters for effective cleaning without streaks.
Apply a few drops of sensor cleaning solution onto the swab. Use only solutions specifically designed for camera sensors.
Gently sweep the swab across the sensor in one motion. Avoid going back and forth to prevent smearing.
Use a new swab if necessary, particularly for larger sensors. One swab per pass helps avoid reintroducing contaminants.
If streaks appear, additional swabs might be needed. They help ensure a streak-free finish.
Ensure that the solution evaporates quickly. This prevents moisture from lingering on the sensor.
Lastly, double-check sensor cleanliness with test shots or visual inspection. This confirms that the wet cleaning has been successful.
Step 5: Checking Sensor Cleanliness and Troubleshooting
After cleaning, it’s vital to evaluate your sensor’s cleanliness. This confirms the efficacy of your cleaning efforts.
Take a test shot against a plain, bright surface. This helps reveal any spots or residue that might still be present.
Zoom in on the image review for detailed inspection. Look for any telltale signs of remaining dust or streaks.
If you notice issues, consider repeating some cleaning steps. Additional passes might be necessary for persistent particles.
Consult online forums or guides if problems persist. Community insights can provide helpful troubleshooting tips.
Sometimes, even after diligent attempts, dust can remain. Professional cleaning services are always an option if needed.
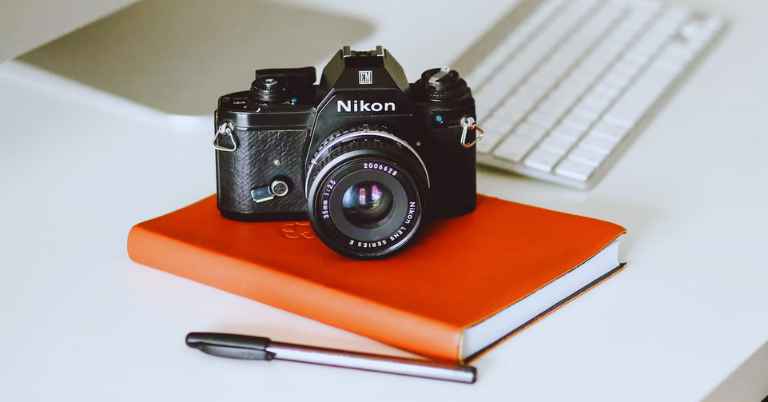
Mirrorless vs. DSLR Sensor Cleaning: Understanding the Differences
Cleaning techniques differ between mirrorless and DSLR cameras due to their structural variations. These differences impact the cleaning process significantly.
Mirrorless cameras lack the protective mirror mechanism found in DSLRs. This makes their sensors more exposed and prone to collecting dust.
With DSLRs, the mirror flips up during cleaning. This provides a brief window to access and clean the sensor with added protection.
Here’s a short list highlighting key differences:
- Sensor Exposure: Mirrorless sensors are more frequently exposed.
- Cleaning Frequency: Mirrorless may need more frequent cleaning due to exposure.
- Accessibility: DSLRs require flipping the mirror up, adding a step.
- Protection: Mirrorless lacks an intermediary mirror, offering less dust protection.
Because the mirror is absent in mirrorless cameras, regular checks and cleanings are often essential. Dust accumulation can impact image quality more quickly.
Similarly, DSLRs’ mirror assemblies offer a degree of dust deflection. However, they require careful handling to avoid touching or damaging the mirror or shutter.
Despite these structural differences, both camera types benefit from similar cleaning tools and techniques. Items such as blowers, swabs, and cleaning solutions are universal essentials.
Owners of both camera types should familiarize themselves with their specific models. This knowledge ensures they’re using the correct cleaning methods for optimal results.
Understanding these contrasts aids in developing effective cleaning routines. Comprehensive maintenance strategies can prolong the life and performance of both mirrorless and DSLR cameras.
Maintaining a Clean Sensor: Tips and Best Practices
Maintaining a clean camera sensor is crucial for capturing clear and stunning images. Following best practices ensures your sensor remains dust-free.
Proper handling of camera lenses reduces the possibility of dust entering the sensor chamber. Always cap your lenses when they’re not in use.
Storing your camera properly is another simple yet effective way to prevent dust accumulation. Use a case or bag that seals well against external elements.
Minimizing lens changes in dusty or windy conditions helps keep the sensor free from unwanted particles. Plan your lens choices ahead of time.
Consider these practices to maintain sensor cleanliness:
- Lens Management: Always use lens caps.
- Proper Storage: Store camera in a dust-proof case.
- Controlled Changes: Switch lenses in low-dust environments.
Regularly inspect your sensor for dust or spots. A simple way is to take test shots against a bright, even surface.
Using a sensor loupe or magnifier helps in spotting stubborn dust particles. This tool aids in identifying areas needing attention.
Incorporate in-camera cleaning functions if available. These can gently shake off loose dust with vibration, extending the time between manual cleanings.
For environments prone to dust, consider cleaning the exterior of your camera frequently. This habit reduces the dust which may otherwise transfer to the sensor.
Additional best practices include:
- Regular Checks: Test for dust via sample shots.
- Use Technology: Activate built-in sensor cleaning.
- Environment Management: Clean your workspace regularly.
When cleaning a sensor, patience and precision are key. Rushing increases the risk of damage, which can lead to costly repairs.
Educate yourself on sensor maintenance through manuals, online forums, and tutorials. Learning from shared experiences can improve your own technique over time.
By adhering to these tips, you can ensure optimal sensor performance. A clean sensor results in better image quality and prolongs the life of your camera.
Professional Sensor Cleaning Services: When to Consider Them
Even with thorough care, there are times when professional sensor cleaning services become a necessity. Self-cleaning may not suffice if stubborn dust or oily residues persist.
Professional services have the experience and equipment to tackle difficult issues without risking sensor damage. They also provide peace of mind if you’re concerned about voiding a warranty.
Complex sensor contamination, such as sticky particles or micro-scratches, requires the expertise of trained technicians. They use specialized tools and techniques not typically found in a home setting.
Consider professional cleaning if your sensor issues recur after self-cleaning efforts. It’s also wise to seek help if you’re uncertain or uncomfortable performing the task yourself. Investing in a professional service can save time and prevent costly mistakes.
The Debate: Wet vs. Dry Cleaning Methods
Sensor cleaning can stir debate among photographers about the best method. Wet and dry cleaning are the primary techniques used.
Wet Cleaning Method
Wet cleaning involves using sensor swabs and a cleaning solution. It’s ideal for removing sticky residues and stubborn particles.
This method effectively eliminates spots caused by more than just loose dust. Wet cleaning agents are designed to evaporate quickly, preventing residue formation.
Dry Cleaning Method
Dry cleaning uses tools like blowers or brushes to remove dust without contact. It’s best for regular maintenance and loose dust.
This method is non-invasive and generally safer if used correctly. The lack of liquids reduces the risk of streaking or residue.
Choosing the Right Method
Several factors should guide your decision between wet and dry cleaning. Consider your camera’s condition, the type of dust, and your comfort level.
Wet vs. Dry Cleaning Key Points:
- Wet Cleaning: Suitable for sticky residue, uses liquid solutions.
- Dry Cleaning: Ideal for loose dust, involves no liquids.
Balancing Safety and Effectiveness
While both methods have merits, selecting the right one depends on your situation. Wet cleaning is potent but demands care to avoid streaks.
Dry cleaning is gentler, reducing direct contact with the sensor. Regular dry cleaning might lessen the need for frequent wet cleaning.
Knowing When to Opt for Professional Help
Sometimes, even the best methods may leave unresolved sensor issues. Here, professional services shine, especially if wet cleaning doesn’t solve the problem.
In summary, understanding the distinct advantages of each method empowers you to maintain your camera well. Knowing when to employ each technique maximizes your sensor’s performance and longevity.
The Frequency of Sensor Cleaning: Balancing Care with Usage
Keeping a camera sensor clean ensures sharp, clear images. However, the question arises: How often should you clean?
Factors Affecting Cleaning Frequency
Several factors influence how often to clean your sensor. Consider how frequently you change lenses and where you shoot.
Outdoor photographers might need more frequent cleaning due to environmental exposure. Frequent lens swapping can introduce more dust to the sensor.
Developing a Cleaning Routine
Implementing a routine is vital for sensor care. Regular checks prevent excessive dust buildup and potential image degradation.
This routine can involve quick inspections before important shoots. Following a checklist ensures that you consistently monitor sensor cleanliness.
What Experts Recommend
Most experts suggest a visual check once a month, adjusting based on usage. If images show spots, then cleaning might be necessary.
Key Influences on Cleaning Frequency:
- Shooting Environment: Dusty or windy locations increase exposure.
- Lens Changes: Often swapping lenses raises dust risks.
- Image Imperfections: Spots in photos indicate a cleaning need.
Balancing Cleaning and Camera Care
Balance is key—over-cleaning can lead to wear or accidental sensor damage. Only clean when necessary to maintain sensor longevity.
Careful, strategic cleaning extends both sensor life and image quality. Always ensure you follow manufacturers’ guidelines to avoid mishaps.
The Role of Sensor Technology
Today’s cameras often include sensor cleaning features. Use these in-camera functions regularly to minimize manual cleaning needs.
In sum, adapt your cleaning frequency to your photography habits and environment. This tailored approach safeguards your equipment while maintaining image excellence.
Conclusion: The Value of Regular Sensor Maintenance
Sensor maintenance plays a crucial role in preserving image quality. A clean sensor captures sharp, unblemished photos, making regular upkeep essential for all photographers.
Establishing a consistent cleaning routine prevents dust buildup, which can lead to unwanted spots in your images. Regular checks save time and frustration by ensuring your camera is always ready for that perfect shot.
Cleaning not only enhances photo quality but also prolongs your camera’s life. By handling your equipment with care, you minimize the risk of damage and maintain its value over time.
Incorporating sensor maintenance into your photography routine is a wise investment. With proper care, your camera will deliver outstanding performance, allowing you to focus on capturing stunning images.
Additional Resources and References
For those eager to delve deeper into sensor care, numerous online forums offer tips and user experiences. Websites dedicated to photography often provide detailed guides and video tutorials to expand your knowledge.
Manufacturers’ official manuals are invaluable resources, providing specific instructions tailored to your camera model. Additionally, photography workshops or local classes can offer hands-on learning opportunities, enhancing your skills in sensor maintenance.